Hi Everyone! Hope you are all having a magnificent day!
Today I am using My Monthly Hero September 2018 to create this fun shaker birthday card.
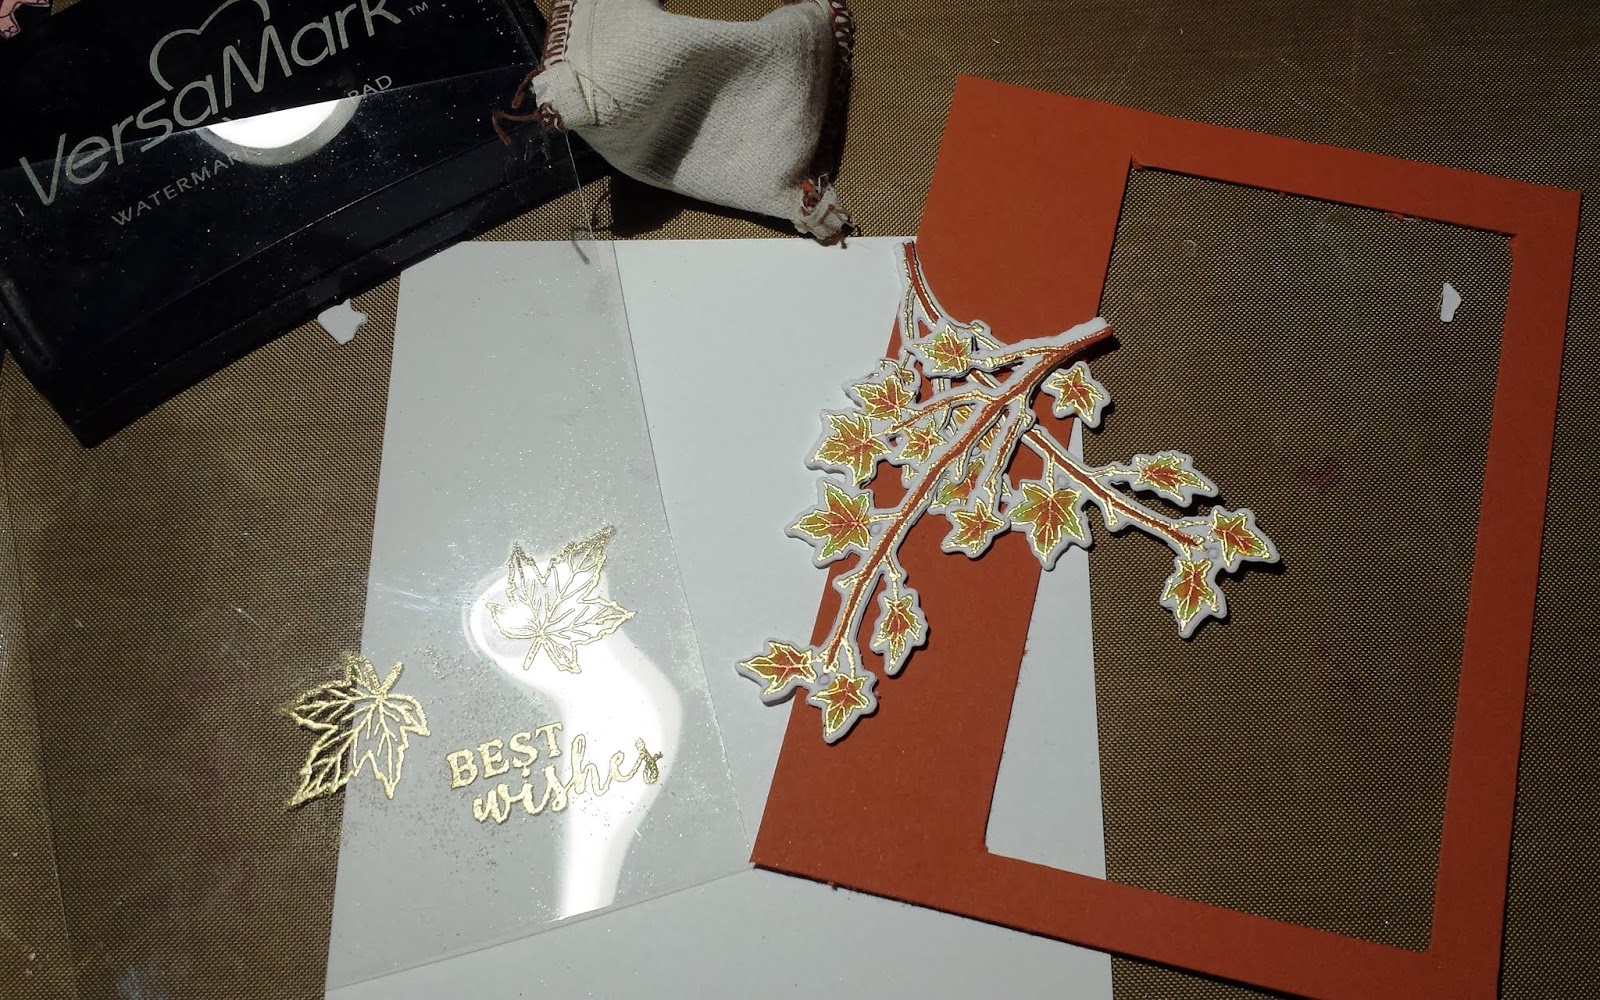
 I started off by stamping, embossing in gold, coloring and die cutting three brunches and two leaves from the set. The Copics I used were YG003, YR04 and R27. They were blending into wonderful fall colors.
 From a 4 by 5.25 card stock (SU Dusty Durango) I cut out a window . It's entirely up to you what window size you want to go with, mine was 4.5 by 2.5 inches. At the same time I cut out a piece of heat resistant acetate, 5 by 3 inches. Towards the bottom of the acetate I embossed the greeting and two leaves in gold. It is very important that you are using heat resistant acetate, folks! Just saying...

 Onto a piece white card stock measuring 4 by 5.25 inches, attach one of your die cuts of the branches and place sequins in the middle. Don't put too many sequins because you want to make sure to be able to see the greeting and want the sequins to move freely inside the shaker.
 Now the time has come to peal the backing from the foam tape and attach the window portion onto the white card stock. Once it is on securely, you can add the two additional branches and the two leaves to the card. I attached the entire thing to SU Early Espresso card stock.

Today I am using My Monthly Hero September 2018 to create this fun shaker birthday card.


I flipped the acetate over and colored the leaves on the back side of the embossed leaves and attached the acetate to the card stock making sure it was covering it well. Now it is time for double side foam tape. I made sure to put it all around the window. If you will rush it, you will have holes in the wall you are creating and the inside of the shaker card will come out - trust me on that one!


What would I different next time around??
I would have stamped the inside branch directly on the white card stock. As you can see the little sequins are getting stuck on the branch die cut. It kind of looks cute but not what I was going for.
I would have put less sequins. Although I was trying to put very little of them, my little was still a bit too much. Oh well, next time will be a charm for sure!
Comments
Post a Comment